golang Test 패키지 사용
golang의 테스트 패키지 중 goconvey 패키지와 stretchr/testify 패키지를 사용하여 빌드없이 코드를 테스트할 수 있다. 빌드 시간이 오래걸리거나, 코드 테스트까지 여러 step이 필요한 경우 유용할 듯 하다.
패키지 사용법에 대해 기록하려 한다.
goconvey
터미널에서 go get github.com/smartystreets/goconvey
$GOPATH/src/project 로 이동한 후 goconvey
성공 시 http://localhost:8080 에서 goconvey 도메인을 확인할 수 있다. 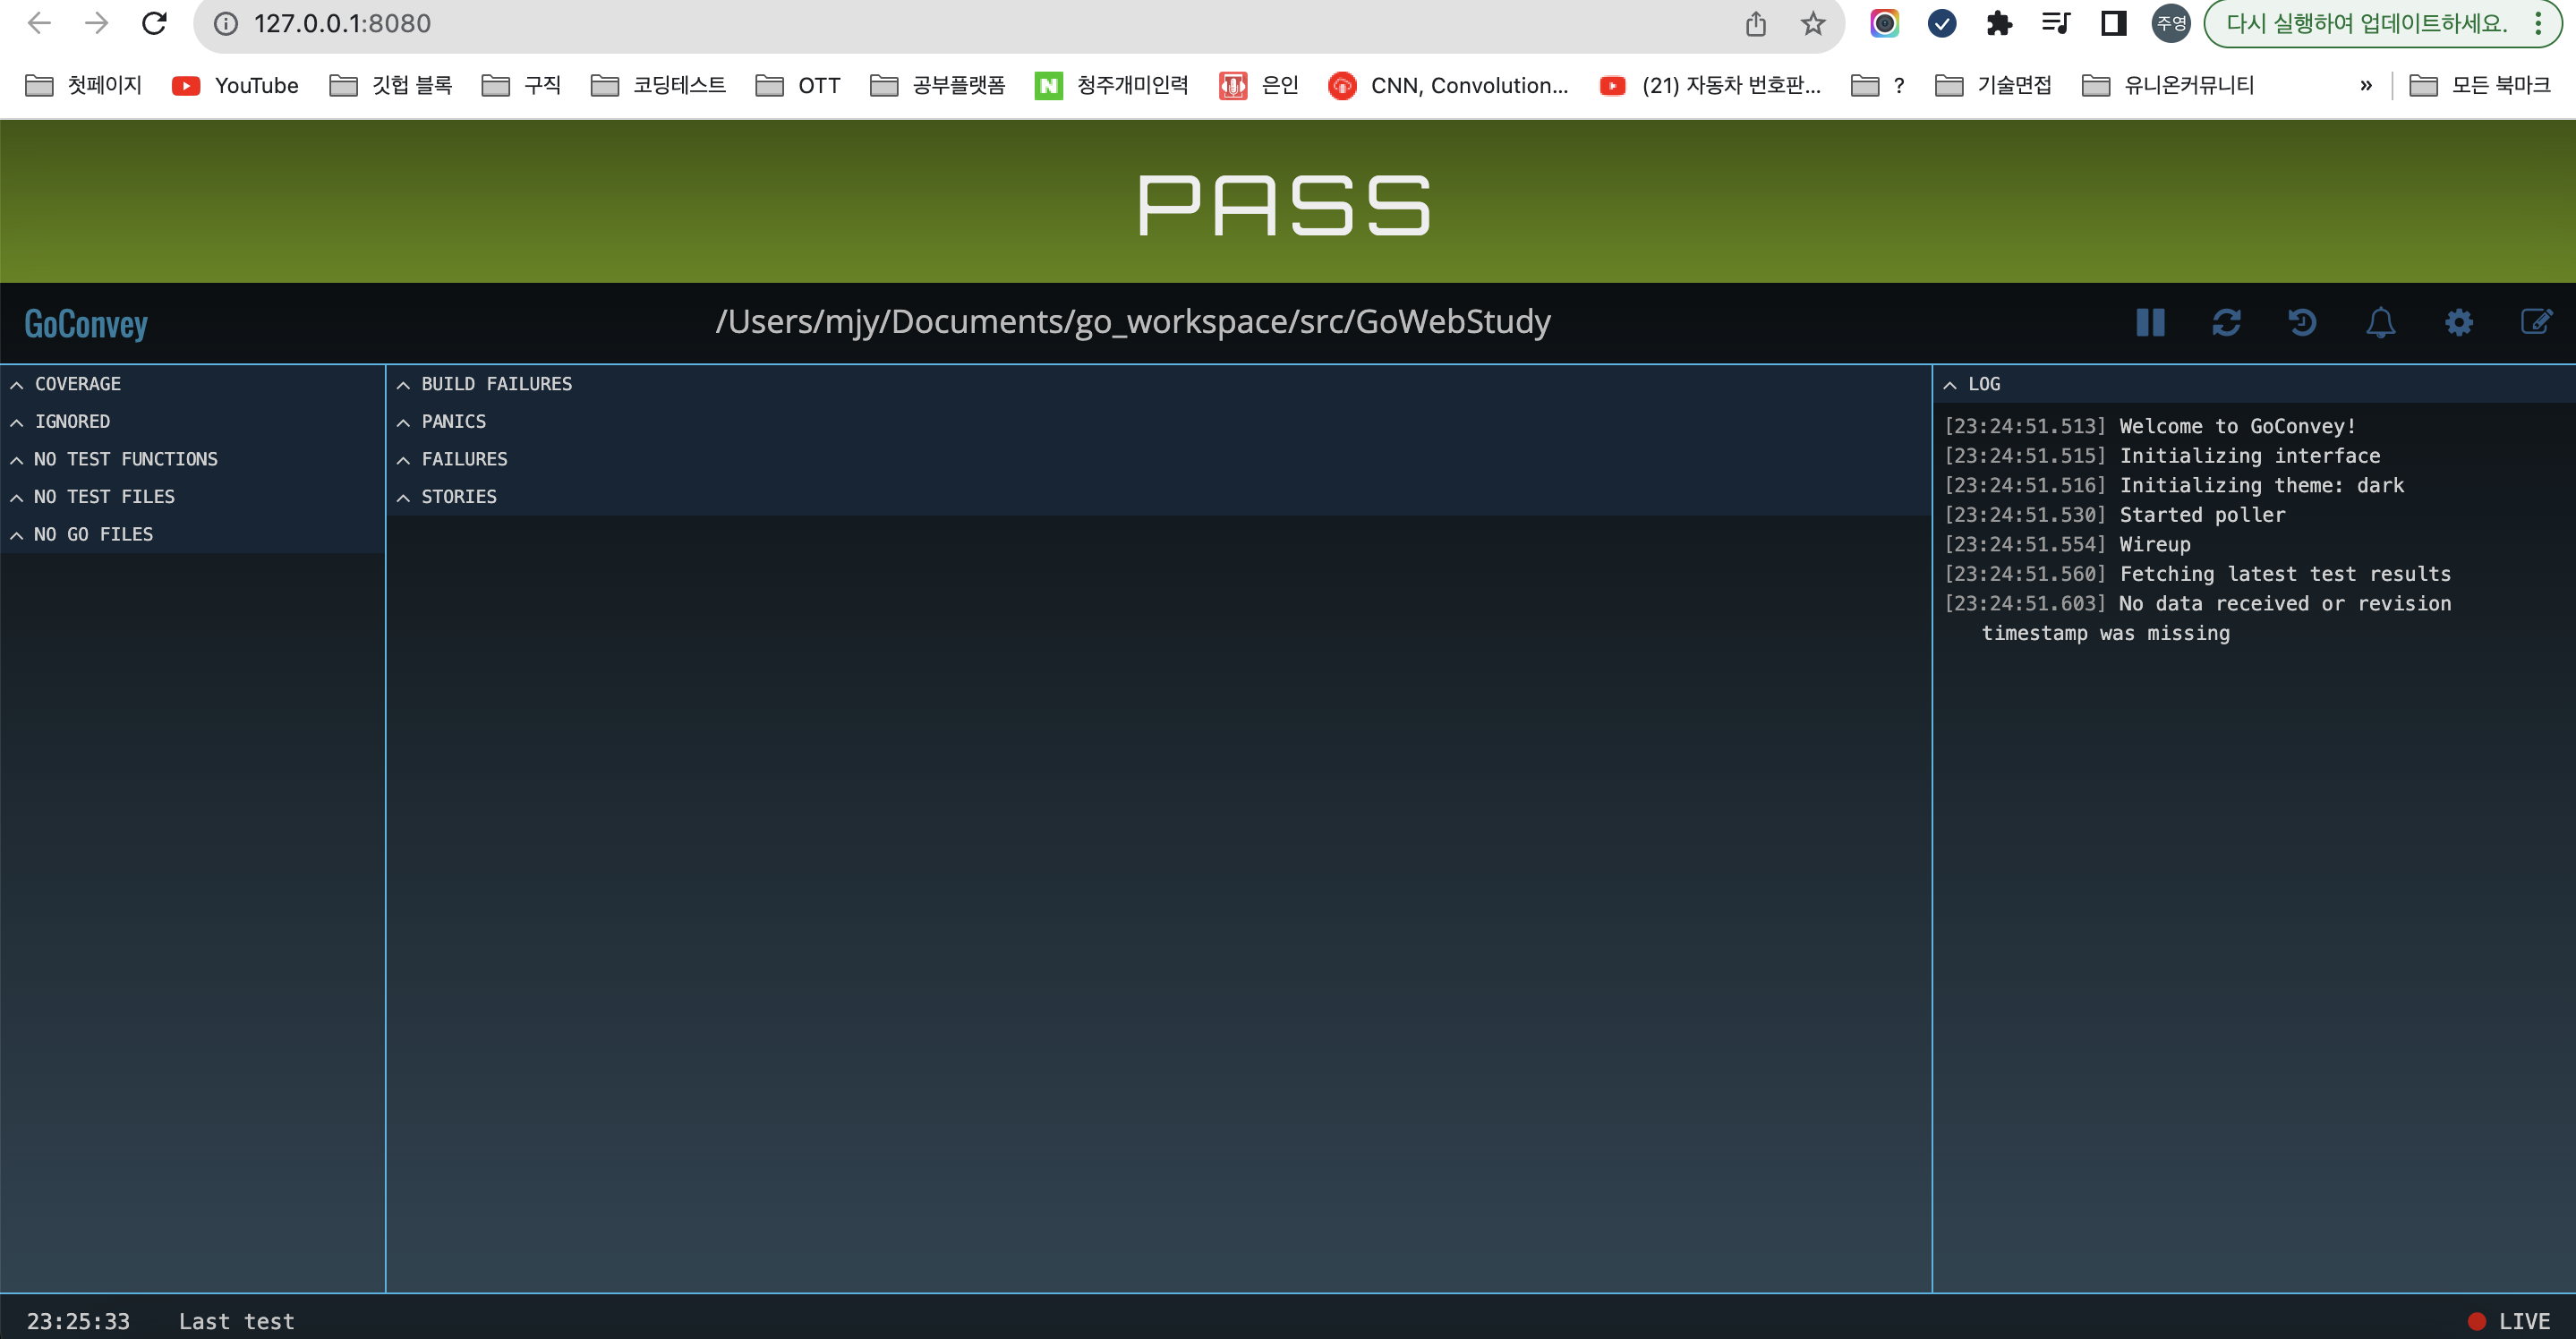
이제 goconvey가 백그라운드에서 계속 돌면서 내 프로젝트의 test 코드를 빌드없이 확인해줄 수 있다.
Test
golang에서는 name_test.go 형식으로 파일 이름 뒤에 “_test”를 붙이면 test파일로 인식한다.
- test 파일을 만든다.
- test 파일 내부에 “Test”로 시작하는 func을 만든다.
- func의 파라미터는 t *Testing.T를 받는다.
- 패키지 내의 mux등을 사용하여 Test를 확인한다.
1
2
3
4
5
6
7
8
9
10
11
12
13
func TestBarPathHandler_WithoutName(t *testing.T) {
	assert := assert.New(t)
    // httptest 패키지를 이용하면 실제 네트워크를 사용하지 않는다
	res := httptest.NewRecorder()
	req := httptest.NewRequest("GET", "/bar", nil)

	mux := NewHttpHandler()
	mux.ServeHTTP(res, req)

	if res.Code != http.StatusOK {
		log.Fatal(res.Code)
	}
}
goconvey만으로 테스트 코드를 작성해보면 다음과 같을 수 있다.
- GET 메서드로 “/bar” 요청을 만들어 mux에 넣고, res 를 확인한다.
- res의 Code를 통해 오류인지 아닌지 판별한다.
결과
테스트코드 작성 후 저장하고 goconvey 로컬 도메인에서 새로고침하면 즉시 결과를 알려준다.

stretchr/testify 패키지
goconvey로 테스트를 진행 시 일일이 if문 사용 등으로 확인하기 번거로울 수 있다.
stretchr/testify/assert 패키지를 사용하면 꽤 편리하게 사용이 가능하다.
go get github.com/stretchr/testify
1
2
3
4
5
6
7
8
9
10
11
func TestBarPathHandler_WithName(t *testing.T) {
	assert := assert.New(t)
	res := httptest.NewRecorder()
	req := httptest.NewRequest("GET", "/bar?name=mj", nil)

	mux := NewHttpHandler()
	mux.ServeHTTP(res, req)
	assert.Equal(http.StatusOK, res.Code)
	data, _ := ioutil.ReadAll(res.Body)
	assert.Equal("Hello msj! ", string(data))
}
assert를 통해 Equal만으로 객체 비교를 편리하게 하여 테스트 코드 작성이 더 간결해진다.
1
2
3
4
5
6
7
8
9
10
11
12
13
14
15
16
17
func TestFooHandler_WithJson(t *testing.T) {
	assert := assert.New(t)
	res := httptest.NewRecorder()
	req := httptest.NewRequest("POST", "/foo",
		strings.NewReader(`{"FirstName":"Prooo", "LastName":"Mun","email":"email"}`))

	mux := NewHttpHandler()
	mux.ServeHTTP(res, req)

	assert.Equal(http.StatusCreated, res.Code)
	user := new(User)
	err := json.NewDecoder(res.Body).Decode(user)
	// data, _ := ioutil.ReadAll(res.Body)
	assert.Nil(err)
	assert.Equal("Prooo", user.FirstName)
	assert.Equal("Mun", user.LastName)
}
body에 담길 json 데이터는 다음처럼 strings.NewReader를 통해 생성하여 테스트가 가능하다.
테스트 코드에서 에러 발생 시
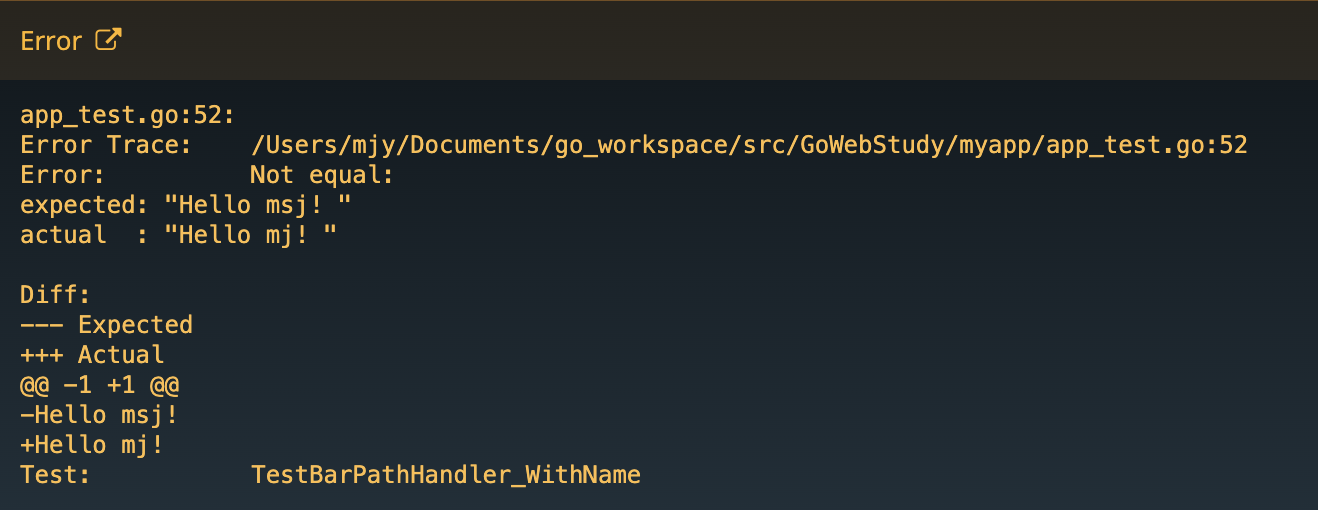
어디서 에러가 발생하고, 뭐 때문인지 세세하게 알려주어 마치 디버깅을 하는 듯 하다! 🤭
💡
지금껏 API 테스트는 포스트맨을 주로 사용하였고, 비즈니스 로직은 재빌드하며 확인했었다.
아무리 golang의 컴파일 속도가 빠르다 해도 한계는 있는법.. 테스트 패키지를 활용하면 더 생산적으로 업무를 진행할 수 있을 듯하다.